Thursday 12 February 2015

J is for Jack Russel Terrier...s, lots of them!

People who are owned by Jack Russel Terries never live a dull life, I'm told. Well, maybe we all should enjoy life to the fullest in the here and now - live like somebody left the gate open, so to speak :-)
Anyway, a few examples of Jack Russel themed cards coming up.

 This is the latest (not even delivered yet!) - a regular 12" cardstock (pink!) folded in half, with a matching striped paper back and front. I found some really cute pictures that just woofed to be toppers, layered them on black and there you are..
Recently bought some really pretty paper orchids that were just perfect for this, with a pink bow to match.

Another birthday, photos of the fourlegged family members. Regular easel card, spring colors, flowers, photos and matting (white and black) cut into ovals.

This is a decoupage for a special friend, using one of the gorgeous images of the Joanna Sheen Giordano Kittens and Puppies CDrom. Blue cardstock, layered decoupage image, a ribbon, a little bling and a sentiment.

 Below two cards I made at the same time (a "thanks for your help"-commission), also from the Giordano CDrom. One twisted easel card with a heart-shaped doily, and the other a regular 12" fold. Ribbons, bow, flowers and liquid pearls for finishing touches.

Saturday 7 February 2015

Steampunk Hat Trick

One of the biggest steampunk accessories apart from goggles seems, when googling, to be hats. 
So, when asked to do a steampunk-themed birthday card I thought a hat would fit the bill best. 
Quite pleased with the result too.

This is the finished hat from one side (feathers, dies, metal flower and cute scissors plus a bit of organza, glitter and pearl bling). The actual hat is dark brown, then lined on the outside with dotted purple/brownish cardstock.
This is the other side, with the congrats embossed in copper on a nicely steampunky hot air balloon cardstock (plus various cogs), cut out after the cloud shapes on the cardstock.
 I had seen plenty of steampunk corsets and corset linings, even on hats, so decided to have that as well, hence this back.

Having scoured the 'net for suitable bling I finally contented myself with decorating using copper pearl and glitter wands from Joanna Sheen (gorgeous sheen and easy to apply!), a few heart-shaped steampunk dies plus metal flowers and cogs ,,
 and of course feathers! Mainly pearl hen feathers, both natural and colored.
Now actually getting the feathers to stick nicely to a hat took quite a lot of glue gel and patience as both feathers and fingers quickly got sticky and uncooperative but we got there in the end.

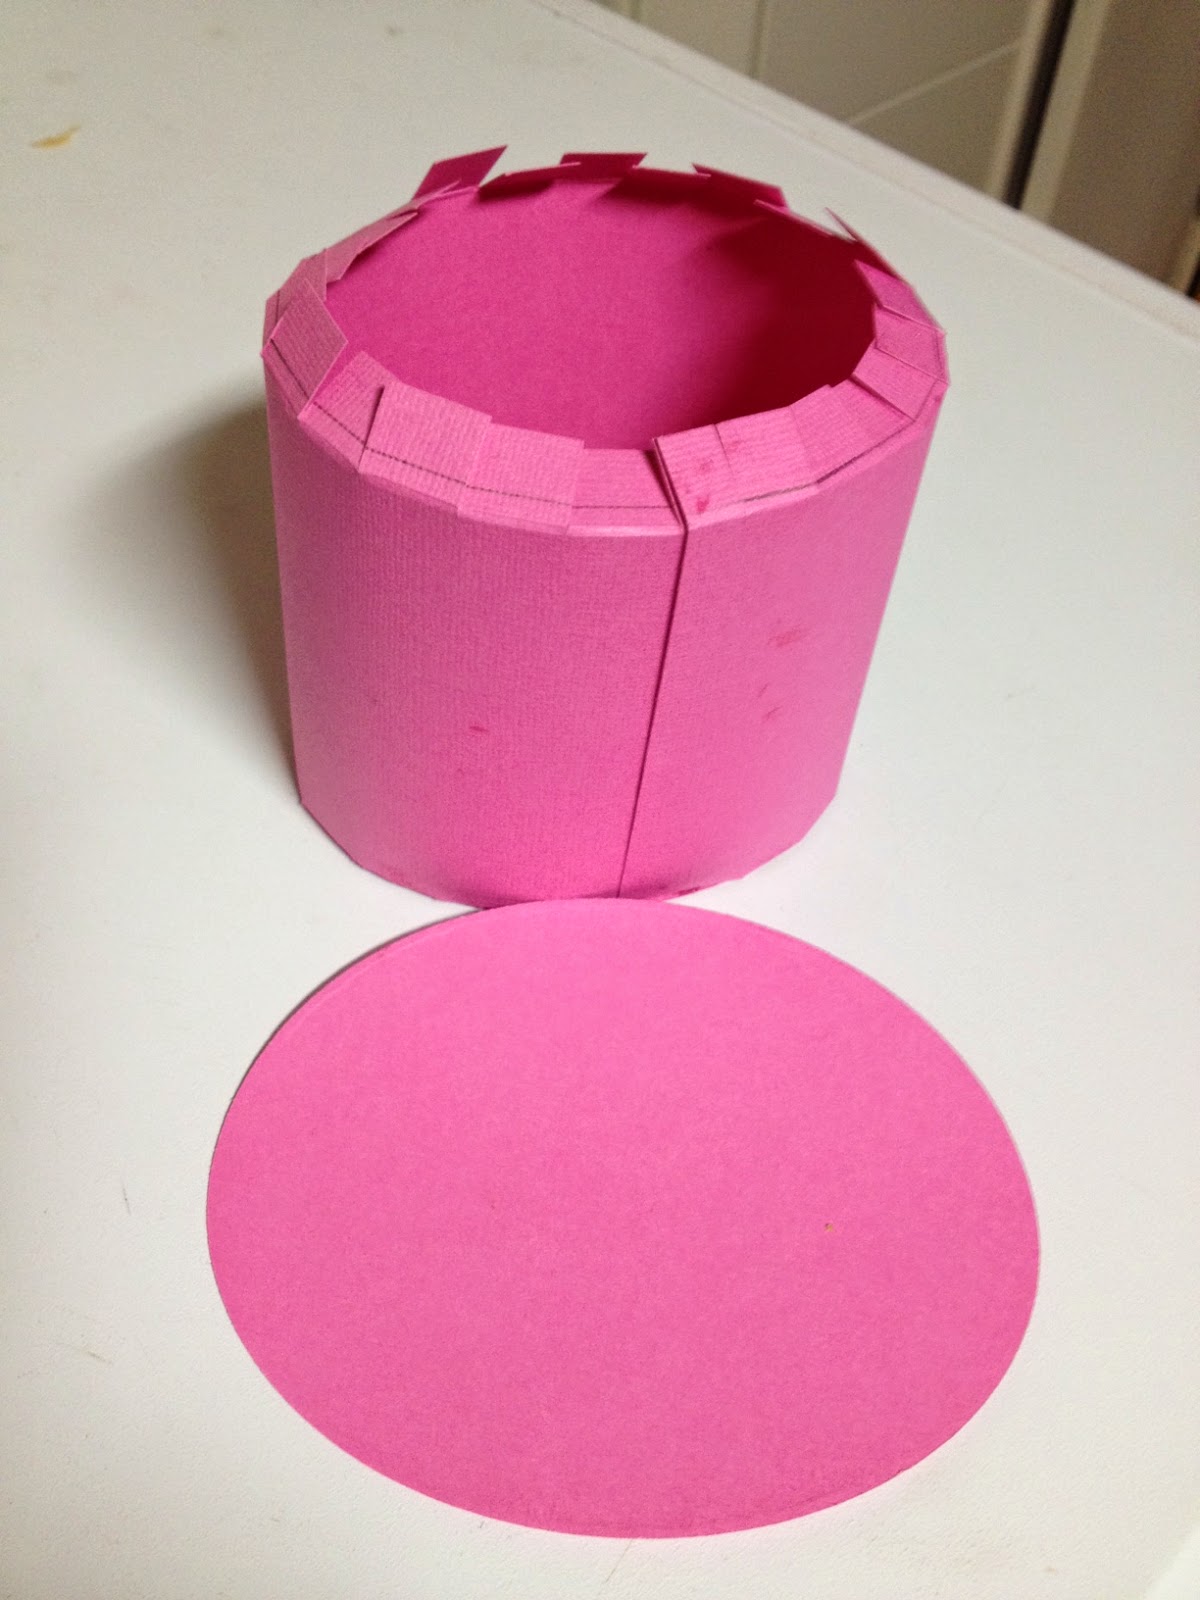
The actual hat shape came from a die, Sue Wilson's Austrian Collection - Salzburg, that made up the top and bottom ovals. "In between" is a 4-5" wide strip of regular cardstock, 12" long, which turned out to be a perfect length to go around the top oval.
The bottom oval was too small as a brim (or rather I should have made the crown bigger near the top and smaller near the brim) and since I was lining the outside anyway I made a bigger brim to match.
Craft Dies from Joanna Sheen, of course :)


Hot chick, steampunk style

A friend requested Steampunk cards for her 40th birthday. Even though I like the genre I hadn't exactly tried making stuff myself before but hey, there's a time for everything, right?

Steampunk might be the new steamy hot .. diverse and brilliantly victorian with a twist. Try googling it, or check out my pinterest page for some of my favorites. 

First of all an easy start using one of the excellent artwork from craftsuprint.com - they have lots and lots of designs and mini-kits from a huge number of talented people. Now this was originally veeeeeeery pink and my friend isn't exactly pinkish-fond so I had to turn it slightly more purple before printing.

Lilac card base, regular 12" cardstock folded in half, matted the design on black background paper and taped it in place. The actual design came with a verse, a choice of banners and various decoupage options which made it a cute easily-assembled card. 


Next up the actual birthday "card" - a steampunk hat..


Saturday 31 January 2015

Dressing it up

Found this really sweet dress pattern somewhere on the 'net and thought it would fit perfectly with a butterfly background paper from the Jane Shasky CDrom.

The card itself is a regular easel fold, lilac cardstock lined with butterfly paper and a bit of green.

Took some trial-and-error to get the folds on the dress right but in the end it worked. And a nice bow at the waist hides any imperfections :-)

The extra butterflies I decoupaged to give a bit of height, Add a ribbon, some liquid perl and some embossed greetings - card finished.
 This is the pattern (not sure if the size is good to use but with a paint program (or a plain copier) it can be resized fairly easily). Dotted lines are scored and folded as seen above.

The bottom text of the card reads (translated)
"A friend is someone who knows everything about you and still likes you"

Friday 30 January 2015

Feelin' Hot Hot Hot

Not that I'm especially hot this time of year but it's the title of this adorable House Mouse decoupage, from the House Mouse Decoupage CDrom (quickly becoming one of my favorites). Some of the other decoupage is available on the other House Mouse CDroms as well, but this one seems to be in one spot only.

Anyway, a friends birthday again and I knew he's into hot chili peppers, the hotter the better even.. So what could be more fitting than a hot birthday card.
Regular 6" card, cream cardstock base, lined with some House Mouse coffee patterned background paper. A bit of decoupage on the topper (not everything available, just a touch), a greeting and a ribbon.

The actual present was of course in theme, a chili pepper recipe book, some dried chili peppers and some chili pepper seeds (tabasco among them) for the curious gardener.

Wednesday 28 January 2015

Tip-toe through the tulips

Tulips. Is there a better way to signal that spring is finally around the corner?
Not so fast in Sweden of course, but at least they are a colorful addition to dark and dreary (or snowy and cold) January when the first batches arrive from Holland (where else than from the Land of Tulips)

I've got a dear friend who adores tulips and also has her birthday in January, So of course she gets masses of tulips in all shapes.

To the left is the 2015 version of my tulip card for her. Nothing exceptional, a regular easel card based on cream cardstock, lined with soft spring green cardstock and a pretty victorian tulip paper with a boquet so nicely placed for the main focal point.

Dies from Joanna Sheen (those leafy dies are so pretty!), border made with a Martha Stewart punch.

Doily, a wooden heart-shaped button and some bling to complete the card.

The gift placed inside the fold was of course a gift card at a scrapbooking web shop :-)
To the right is last year's card. Also a regular easel card. Neat and easy.
I was temporarily out of tulip paper (!) so went to craftsuprint.com, an excellent resource for all kinds of cards and craft projects You download and pay for the designs you want to use (prices from 0,20 and up), and once donwloaded they can be used as many times as you like.


As one of my favorite authors would say..
"But I have always thought that these tulips must have had names. They were red, and orange and red, and red and orange and yellow, like the ember in a nursery fire of a winter's evening. I remember them" - Neil Gaiman in Coraline

Christmas Catch-Up, part 2

Well, what to do with this nice new Bigshot, all the papers, CDROMs, embossing folders, dies... Make cards, of course! Lots of cards! Just in time for Christmas!

A few samples of this year's Christmas cards:

CDROMs used were PollyAnna Pickering's Christmas Moments and Magical Christmas Moments from Creative Crafting World. They have other lovely CDROMs and DVDs too - check them out! Especially their series Paws For Thoughts are favorites of mine. Only wish there was a larger selection of breeds available.

Embossingfolders and dies from Joanna Sheen - don't miss out on the ivy dies, especially the mirrored pairs - gorgeous and so fitting for all occasions - and of course the usual selection of satin ribbons, liquid pearls (gold) and poinsettia Christmas flowers. I used a few metal charms as well, lovely but took some glue to make them stay in place.


 The birds on the following two cards are from a coloured art pad by Lily Of The Valley.
Great value for money!!
Such adorable pictures and often available at special prices. They had some great offers before Christmas so I treated myself to lots and lots of art pads....

Thought I'd try making a white card too, embossing folder and poinsettia die. Not too bad.

Christmas Catch-Up, part 1

Having thought about it for a year or so I finally treated myself to a Sizzix Bigshot a few months ago!

We've had a lot of fun since, even though it makes this hobby even more expensive as there are plenty of Must-Have dies and embossing folders.. 


I've also bought a lot of CDRoms, most of them from Joanna Sheen. The combination made for rather quick Christmas cards (apart from the usual paper-matching-selecting agony), quick but still rather nice if you ask me...

Twisted easel cards, my favorite variety and oh so easy to make - instead of scoring straight at 3" to make a regular easel card, score vertically.

Here's a good tutorial on twisted easel cards from youtube..

Thought I'd share two examples of Christmas cards using Joanna Sheen's House Mouse Christmas CDROM, two of the sweetest pictures with several decoupage layers, decorated with liquid pearls, satin ribbons and poinsettia christmas flowers.

Here is a list of all Joannas CDROMs - they're too lovely to only link to House Mouse.

By now I think I've bought them all. Oooops..